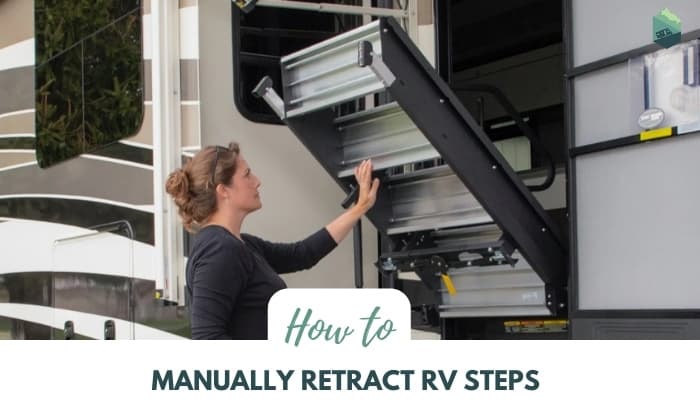
Nowadays, the focus is on the convenience and easy operation of everything which is why almost everything can be automated. This includes the steps of your RV. While automated steps certainly make things convenient and it surely has safety measures to prevent accidents, learning to manually retract RV steps is important as well.
This is because knowing how to manually retract RV steps will allow you to operate your RV’s steps even when their automated feature is broken.
With that said, here’s a tutorial on how to manually retract your RV’s steps.
Page Contents
Step-by-Step to Manually Retract RV Steps
Step 1: What you will need
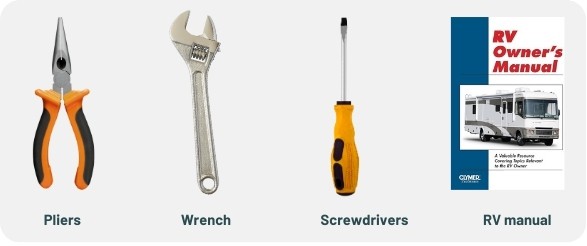
Before we go into detail about how to retract your RV steps manually, let’s first list down everything you need for the task. They are as follows:
- Pliers (longnose, regular, etc.)
- Wrench (traditional and adjustable)
- Screwdrivers
- RV manual (physical copy or digital)
Once you have prepared all the tools you need for the task, you can now proceed to do the following steps:
Step 2: Prepare your RV
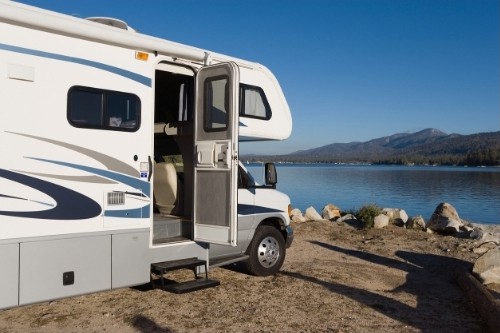
Make sure to park it somewhere flat, preferably on concrete, and has decent lighting or a light source bright enough to see. To keep your RV from rolling away or onto you while you work, you can place something behind the tires like a large rock. Make sure to clear your work station as well to avoid preventable accidents and injuries.
Preparing your RV and taking the necessary precautions will ensure that you don’t find yourself with an injury or get caught in an accident while manually retracting the steps.
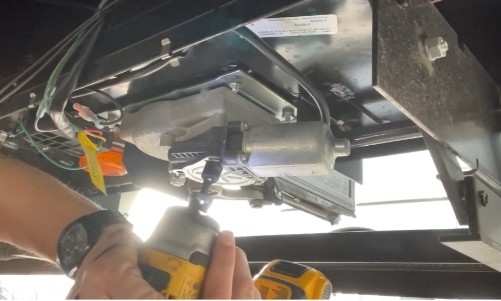
Step 3: Locate the retraction mechanism
This is usually located beneath the RV steps themselves. To help you with this, you can consult your RV’s manual as it may provide you with the information to correctly locate it. Once you have done so, identify the following parts of the mechanism:
- Linkage pin or bolt – This links the steps’ frame and the step linkage or the retraction mechanism. This can be in the form of a pin or a threaded bolt and nut.
- Step frame – This is the steps themselves.
- Step linkage – This is the mechanism used to automatically retract the steps.
Step 4: Remove the linkage pin or bolt
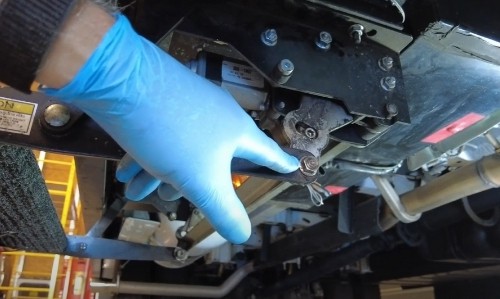
Once you have located and identified everything, you can now remove the linkage pin or bolt. If it’s in the form of a pin, remove the lock pin and then pull out the linkage pin. If it’s a bolt, unscrew it first then remove it.
Step 5: Detach or unlink the step linkage and step frame
After removing the linkage pin or bolt, you can now detach or unlink the step linkage from the step frame. To be able to do this, you need to slightly pull the linkage out of its link slot. From there, you can easily do the next step which is to retract the steps manually.
Step 6: Manually retract the steps
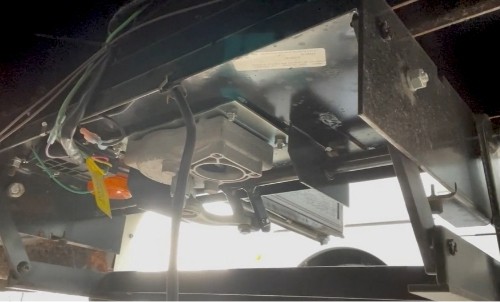
Once you have unliked the step frame and step linkage, you can now manually retract the steps. If you want to keep the steps in place, you can use a rope or cord to tie it down and keep them in place.
Step 7: Reattach the linkage when possible
Once the steps have been manually retracted, you could reattach the linkage if you can do so. Replacing the linkage pin or bolt will help you avoid misplacing important parts and risk having to replace the whole mechanism altogether.
Conclusion
While every step retraction mechanism of RVs is different, these are just some of the basic steps you can take to manually retract them. To ensure that what you’re doing is correct, make sure to check out your RV’s manual as it may provide you with the necessary information for manually retracting your RV steps.
Although most steps are now automated, it’s still handy to have the knowledge of manually retracting your RV’s steps, especially when the automated mechanism is messed up.
With that said, if you enjoyed this tutorial on how to manually retract RV steps, feel free to share them and if you have any questions or concerns, feel free to leave a comment.

My career journey has been marked by a variety of roles. I served as a Personal Trainer for Children, Fitness Instructor, and Home-Based Consultant in Detroit Wayne Integrated Health Network.
More than ten years of traveling in my caravan have lent me a deep appreciation of freedom. Without the shackles of being tied down to one place, I get to explore many parts of the world and relish the exhilaration that comes with discovering new things. Throughout my journey, I have been a member of FMCA (Family Motor Coach Association) since 2020. Thus, living on the road has never become boring for me.
As someone with a burning passion for traveling, I want to inspire others to adopt a nomad lifestyle to appreciate the beauty of the world. This, of course, requires a functioning vehicle that can always make you feel at home, even when you’re far away from modern life.
Therefore, I seek to put my experience to good use—helping you with your adventure on the road. As a result, I launched and managed the Outdoorbits website, where I likely share my enthusiasm for outdoor activities and health-related insights.