Preparing for the cold season can be very hard, especially when you leave your RV dormant for the winter. A lot can happen if you leave all the water-filled pipes and tanks that will threaten to burst. If you are concerned about your RV, winterizing it will be the best solution for you.
Typically, RV owners ask for a professional’s help to winterize their RV with antifreeze, but some choose to do it independently. If you are curious and would like to know how to winterize RV without antifreeze, read below to learn more about it.
Page Contents
- Detailed Steps to Winterize RV Without Antifreeze
- What You Will Need
- Step-by-Step Instructions
- Step 1: Drain the fresh water tank
- Step 2: Drain both black and grey holding tank
- Step 3: Check all other machines that use water
- Step 4: Drain all faucets and toilets of water
- Step 5: Use the air compressor and blowout plug for the water lines
- Step 6: Make sure that all water is drained
- Step 7: Check other valuable items in the RV
- Conclusion
Detailed Steps to Winterize RV Without Antifreeze
Draining water from your RV is an essential step in preparing it for the harsh cold brought by the winter season. During camping season, your water tanks are filled with water. If these are left filled, chances are they will freeze and burst eventually. Therefore, it’s necessary to drain your RV’s tanks and pipes of all water before winter comes.
What You Will Need
- A Blowout Plug
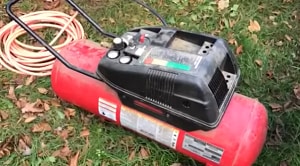
- Air Compressor
You can winterize your RV on your own by using compressed air. This is by far an easy way to make sure that there is no water left in your RV. Of course, you would need a blowout plug and an air compressor before getting started.
A blowout plug is a small device attached to a water line to clear it out completely. You can purchase this online or at any store that sells RV parts. On the other hand, an air compressor will pressurize air so that you can blow out water from your RV’s tanks and pipes. You can have the option to get an air compressor with a tank or a tankless one.
Once you have these two devices, you’ll be able to start with blowing out water from your RV’s lines and prepare it for winter.
Now that you have the necessary equipment, here is a step-by-step instruction to help you know how to winterize your RV without using an antifreeze.
Step-by-Step Instructions
Step 1: Drain the fresh water tank
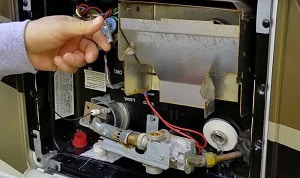
Start by draining the tank which holds all the fresh water. For this step, you need to open up the petcock, a small valve used for draining purposes. Once you locate this, simply open it up, and the water will drain automatically. Make sure to do this as your first step, and do not drain your RV’s water heater just yet.
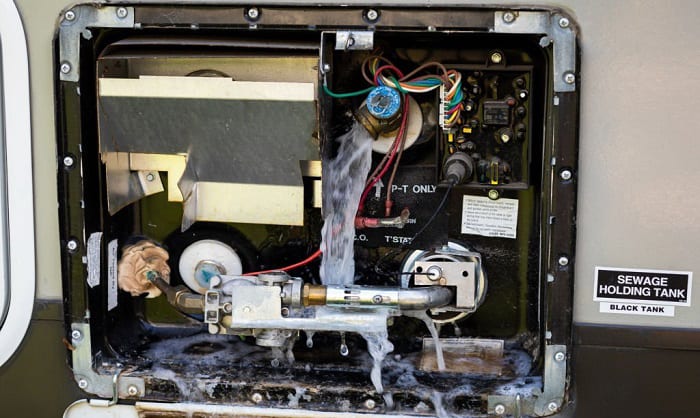
Step 2: Drain both black and grey holding tank
Once you are finished with draining the fresh water tank, you can now move over to draining both the black and grey holding tanks. First, however, you should take note if your RV has a built-in system or not.
If you don’t have a built-in system, you would need a wand or a specific product to clean the tanks. It is easier to clean with a built-in system since you would only need to connect a hose to the valve, and it will drain automatically. Make sure to deposit all collected waste to a local dump station.
Step 3: Check all other machines that use water
While you’re draining the black and grey tanks, make sure to check the manual for draining other machines in your RV that uses water, such as a washing machine, dishwasher, and refrigerator. Also, please read all the instructions regarding winterizing these machines as they may all have different ways of making sure that they’re drained and ready for the cold season.
Step 4: Drain all faucets and toilets of water
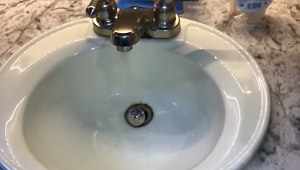
The next thing that’s left for you to do is to open all water faucets, both hot and cold. These include sink faucets, toilets, and for showers or bathtubs. To get rid of all the water in your toilet, you can flush it more than a couple of times until you don’t see any water anymore.
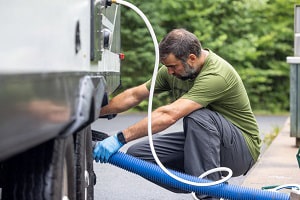
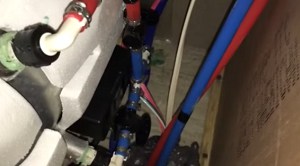
Step 5: Use the air compressor and blowout plug for the water lines
For the next step, you would need the two pieces of equipment that we prepared earlier on the blowout plug and the air compressor. All you should do is connect the blowout plug to your RV’s water lines. Make sure that it’s properly attached and secure in its place.
Once you are finished securing the blowout plug, connect the air compressor to the blowout plug and ensure that the air compressor is 30 to 50 psi. Then, turn it on and let it do its job, but turn it off once water is blown from the valves.
Step 6: Make sure that all water is drained

Once you have finished doing the steps before, all you need to do is ensure that all water is drained from your RV. It would be best if you would double-check everything that uses water, including all the machines.
Make sure to disconnect the blowout plug and air compressor from the waterline and secure it in place. Also, check all of the water inlet caps and replace them if needed. Finally, close all the faucets and secure the petcock to make sure that they won’t be affected much by the harsh cold of winter.
Step 7: Check other valuable items in the RV
Once you are finished draining all water from your RV, the very last thing that you need to do is to check the other items in your RV, such as food, clothing, or any other valuable items. Remove any liquid that you have in your cabinets or refrigerator, such as juice and water. Also, remove any food as mice and ants may target it.
Cover up all the holes around your RV. I’m sure you wouldn’t want any type of bird, pest, or insect to enter your RV during winter and make it their own home.
Conclusion
Knowing how to winterize RV without antifreeze can be very beneficial for any RV owner. You will be able to prepare your RV for the harsh weather that will come and prevent any damage from occurring. In addition, winterizing your RV will help preserve all of its functions, and you’ll be able to return to it in good condition.
Was this article beneficial for you? Please share your comments down below. Also, make sure to share them with your friends who wonder how to winterize their RV without antifreeze.
“Hi, I’m Francis’ husband—Calvin. Our story began with our shared passion for traveling. I have had a career journey for over 11 years at Ford Motor Company, where I took on the role of BMS SW Process Engineer.
Together with my wife, I have dedicated countless hours to exploring every nook and corner of the world. Ten years living in an RV may seem long, but time seems to fly by when I’m doing what I love with the person I love.
FMCA’s 103rd International Convention & RV Expo in Gillette, WY,
Like my wife, I hope to help you see the beauty of traveling off the beaten path by sharing insights into this lifestyle. In addition to my corporate roles, I also launched our website – Outdoorbits, in 2015 and continue to contribute my knowledge and skills to the present day. And I’ll be completely honest with you—no hiding the truth or sugarcoating the possible challenges.
So, if you want to run away from the busy lifestyle to embrace nature, I’m your guy.”