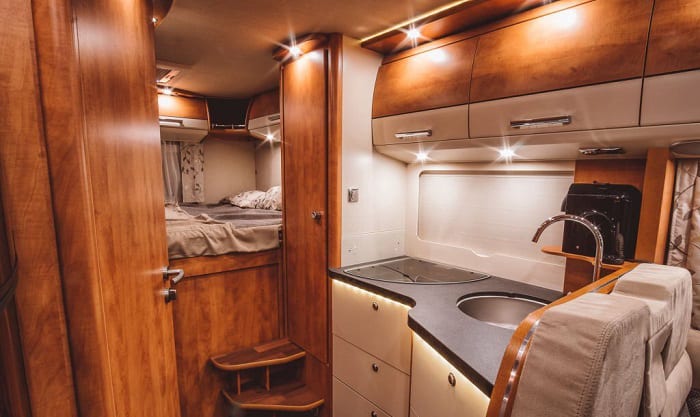
RVs are the vehicles of choice for those who love the freedom the outdoors has to offer but still want some level of comfort that only home can give. However, you will still need light to properly enjoy your RV and the experience of being outdoors is one – something that can be difficult to do if your light bulbs are broken or have ones that consume too much energy.
Whether the reason is broken light bulbs or you simply want something more energy-efficient like LED light bulbs, knowing how to replace RV light bulbs is an important aspect of owning a recreational vehicle. The latter reason is especially important because RVs do not have a steady power source, unlike regular homes.
Whatever your reason may be, as an RV owner, it’s always good to know how to replace light bulbs in RV. With that said, here’s a short step-by-step guide to replacing the light bulbs of your RV.
Page Contents
- Detailed Steps to Replace Light Bulbs
- Things You Will Need
- Step-by-Step Guide
- Step 1: Turn Off or Disconnect From the Power Supply
- Step 2: Remove Your RV’s Light Caps
- Step 3: Remove the Light Bulbs
- Step 4: Remove the Old Plastic Casing
- Step 5: Disconnect All the Wires
- Step 6: Connect the New Fixture’s Wires
- Step 7: Turn the Power Back on
- Step 8: Screw in Your New Light Fixtures
- Step 9: Replace Your Fixture’s Plastic Bulb Covers
- Conclusion
Detailed Steps to Replace Light Bulbs
Things You Will Need
Before we get into replacing RV light bulbs, here are the things you will need to successfully replace them. In this tutorial, we’ll be focusing on updating your RV lights to LED ones and these are the items you will need to do so.
- RV light bulbs (either 120v or 12v)
- Wire stripper
- Wire nuts
- Ryobi drill
- Electrical tape
Step-by-Step Guide
Now that you have everything you need to replace your RV’s light bulbs, we can now move on to the actual steps.
Step 1: Turn Off or Disconnect From the Power Supply
Before doing anything, you need to ensure that the power has been properly shut off or to be even more sure, that the power supply has been disconnected completely. This is a safety precaution that many forget to practice which can lead to injuries if you’re not careful.
After all, you’re working with something electrical and this can lead to you being shocked if you don’t properly disconnect the power. Besides, it’s better to be safe than sorry, don’t you think?
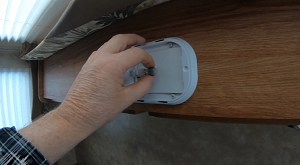
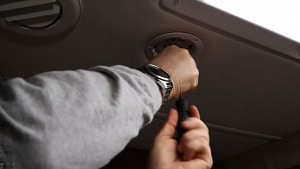
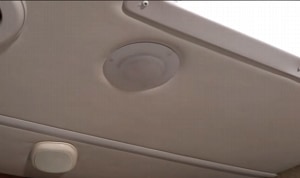
Step 2: Remove Your RV’s Light Caps
Every RV is different and while some may not need to remove or even have light caps, I’m still including this step as it’s important, especially for the next step of this tutorial. Remove the light caps, it may require pinching from the sides to loosen them and pulling them down to remove them.
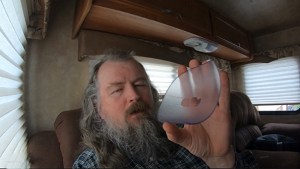
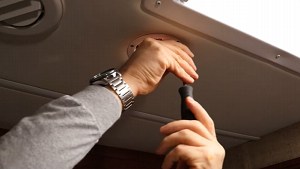
Step 3: Remove the Light Bulbs
Once the light bulbs are visible, it’s time to remove them so you can replace them with your new LED bulbs. Be careful when doing so, especially if they’re old bulbs and are made of glass as they can break and spread broken shards everywhere.
Normally, you’ll just have to twist the bulb a bit to loosen and unlock it and they will spring out so you can remove them.
Step 4: Remove the Old Plastic Casing
Once you have removed both the old light bulbs and plastic caps, you can now grab your drill to remove the screws holding the rest of your lighting fixture in its place. If you have successfully removed it, it should now be hanging by its wires.
Step 5: Disconnect All the Wires
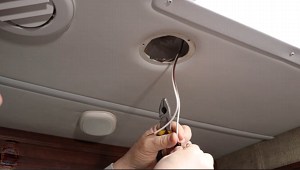
Before you do so, make sure you have disconnected the power supply so you don’t accidentally shock yourself. It’s also important to understand which wires are which before disconnecting them. If you’re already sure which ones are which, then you can completely remove the fixture and set it aside.
Step 6: Connect the New Fixture’s Wires
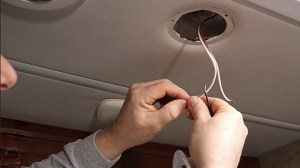
Again, you must know which one’s which. Normally, RVs have 2 wires – black and white. The black wire is usually the ground wire whereas the white one is for the power supply. However, this may not always be the case as the ground can be different.
If your new fixtures don’t have enough exposed wire, you can use your wire stripper to strip more of the casing off so you can properly attach it to your RV. Connect the ground wire to the ground, power to power. Use a wire nut to secure the wires. You can also secure it further with some electrical tape.
Step 7: Turn the Power Back on
To check if everything’s ok, turn the power back on. Once you have ensured that everything is in working order, turn it back off as you will need to screw in your new bulbs.
Step 8: Screw in Your New Light Fixtures
Once you’re done, you can now screw in the new light fixtures or light bulbs. If your new lighting isn’t the same size as your previous one, try your best to cover the holes left behind with the light fixture itself so it doesn’t appear off.
Step 9: Replace Your Fixture’s Plastic Bulb Covers
After ensuring that everything is in place, replace your plastic bulb covers and you now have new RV lights.
Conclusion
Did you enjoy the tutorial? Knowing how to replace RV light bulbs is important, especially considering how few the light sources are when out camping.
Feel free to share the article if you enjoyed it and let me know what you think in the comments.
“Hi, I’m Francis’ husband—Calvin. Our story began with our shared passion for traveling. I have had a career journey for over 11 years at Ford Motor Company, where I took on the role of BMS SW Process Engineer.
Together with my wife, I have dedicated countless hours to exploring every nook and corner of the world. Ten years living in an RV may seem long, but time seems to fly by when I’m doing what I love with the person I love.
FMCA’s 103rd International Convention & RV Expo in Gillette, WY,
Like my wife, I hope to help you see the beauty of traveling off the beaten path by sharing insights into this lifestyle. In addition to my corporate roles, I also launched our website – Outdoorbits, in 2015 and continue to contribute my knowledge and skills to the present day. And I’ll be completely honest with you—no hiding the truth or sugarcoating the possible challenges.
So, if you want to run away from the busy lifestyle to embrace nature, I’m your guy.”