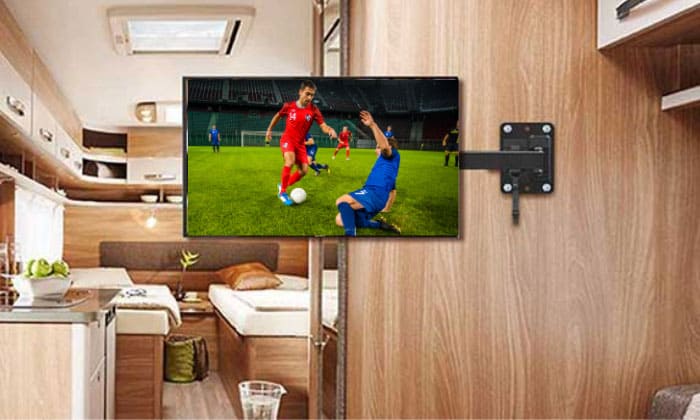
A TV is a great add-on to your recreational vehicle. That’s because a TV can provide you with the same level of comfort you get when you’re at home. ou’ll enjoy the same watching experience from your living room– especially if you don’t have time to be a couch potato because you’re always outside.
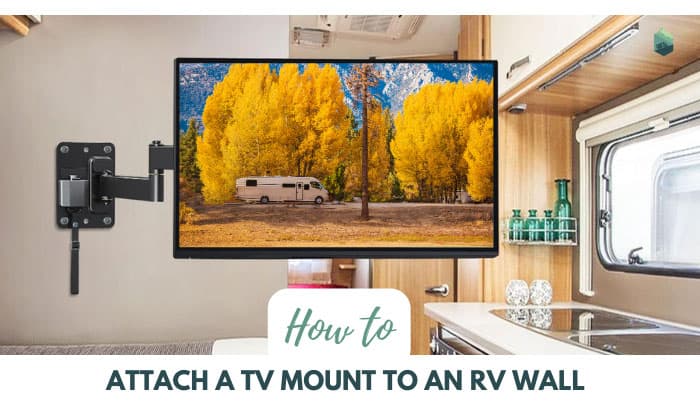
But, installing a TV in your RV isn’t as easy as it sounds, and figuring out how to attach a TV mount to an RV wall could be very challenging. That’s especially true if it’s your first time. Here’s how you can travel while being entertained!
Page Contents
How Do You Install a TV Wall Mount in an RV
Before you start with the RV TV installation, you’ll have to gather all the necessary tools first for a less hassle experience. Every RV TV wall mount varies, but here are the most common tools to gather for the task.
What to prepare:
- A level stick to ensure your TV is properly aligned
- A stud finder to locate the studs of your RV wall
- A marking tool to help you drill the correct areas
- A power drill and drill bits or a Phillips head screwdriver to make the holes and secure the TV mount
- Screws that are almost as thick as your RV walls, such as 1 ½ and 1 ¾ inch screws
- An RV television mount to secure a TV in a camper
Once you’ve gathered all the tools, here’s a step-by-step guide on how to hang your TV on your camper wall.
Step 1: Choose the type of TV mount you want
There are many kinds of RV TV mounts. Choose one depending on the size of your TV and your preferences.
- Full-Motion Mounts
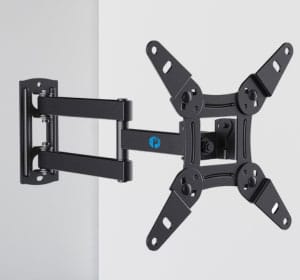
These mounts can be adjusted to various angles and positions for optimal viewing. You can turn it around to face your living space and turn it back to your bed space when you decide to hang out while lying down instead.
Some also offer mounts that can rotate 360 in a degree angle.
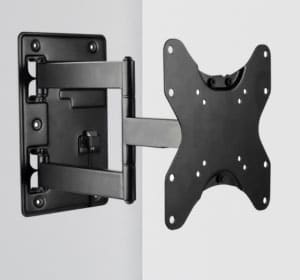
- Articulating Mounts
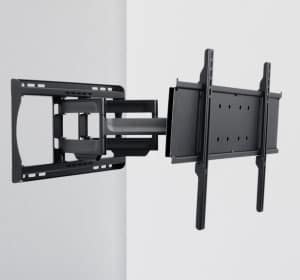
The articulating mount comes with an ‘arm.’ You can fold this ‘arm’ when you want a fixed view. But, if you’re in a different part of your camper, you can swing this arm in a different direction so you can still watch TV.
- Tilt Mounts
The tilt mount lets you adjust your TV vertically. You can adjust it upwards or downwards– depending on your viewing preferences.
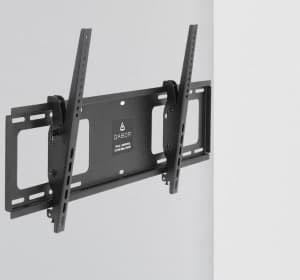
- Fixed Mounts
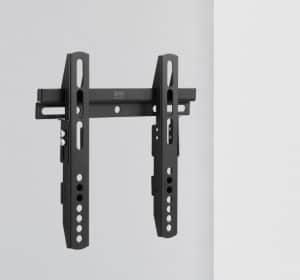
These mounts keep your TV in a fixed position against the wall. They are ideal for TVs that don’t require frequent adjustment.
- Removable TV Mounts
As the name says, this TV mount is removable and is suited for smaller RVs. These are flexible mounts that can let you bring your TV outdoors.
Step 2: Position your TV

Determine the ideal location for your TV. Consider factors such as the viewing angle, available space, and accessibility to power outlets.
You should also look into RV TV mounting ideas, such as positioning your TV above eye level if you plan on lying down or reclining while watching.
Step 3: Find studs
Use your stud finder to locate the studs in your RV wall and mark their positions using your marking tool.
In a Forest River RV, the stud size is usually 2×2 inches. You can try to knock along the walls to find these easier. Mounting your TV on studs will ensure a secure and stable installation. In Jayco RVs, you’d see stickers that say where you’ll have to place your TV mounts.
But, if you’re working in a travel trailer without studs, you can buy some RV wall anchors that can let you hang your TV to any RV wall.
You can also opt for ceiling mounts, where you attach your TV to your ceiling’s joists and beams instead of studs.
Step 4: Drill holes
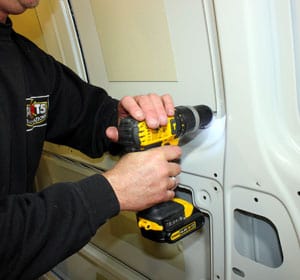
Once you’ve found the right location with the studs ideally present and marked, drill the marked spots with the appropriate drill bit (depending on your RV wall). The drill holes should be slightly smaller than your screws.
Step 5: Install the mounting brackets
Each RV TV has different mounting instructions. Follow the manufacturer’s instructions religiously, while making sure that your brackets are well-aligned with the holes you drilled.
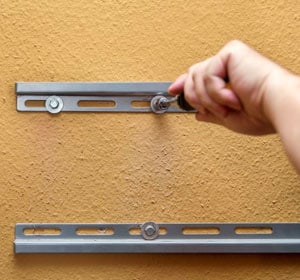
Step 6: Attach the mounting plate
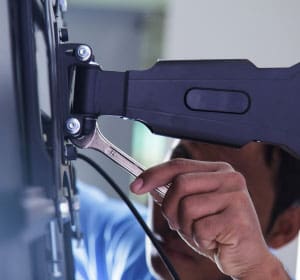
Here’s how to secure your RV from falling: attach the mounting plate to your RV wall using the screws either by drill or your Phillips head screwdriver (it may take a long time, though). Before you screw them, use your level stick to ensure it’s properly aligned.
Step 7: Place and connect your TV
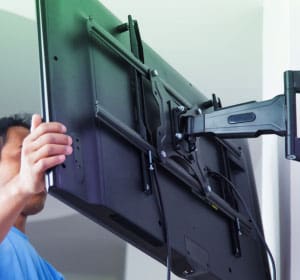
With the mounting plate securely in place, carefully lift your TV and align it with the mounting plate. Gently slide your TV into position. Regarding the RV TV mount locking, you’ll hear a click when it’s already in place.
You can now then connect the necessary cables, such as the HDMI, power cords, and antenna, to the TV. For a quick connect, install a smart TV that can be easily connected to the wifi for instant viewing.
Frequently Asked Questions
Are all TVs mountable?
Not all TVs are mountable. But, many modern TVs are already mountable because they are required to adhere to VESA (Video Electronics Standards Association) standards. That means they follow a universal hole pattern for TV mounts. Flat screens are usually the TVs that follow VESA standards.
What size screws to mount the TV in the RV?
The appropriate screw sizes for mounting an RV TV are 1-1/2 inches for thin walls to 1-3.4 inches for thicker RV walls.
What is the maximum weight that an RV TV mount can support?
The weight capacity of an RV TV mount varies depending on the specific model and design. But it usually supports 30 to 175 pounds or 14 to 79 kilograms.
Before purchasing a TV mount, check its weight capacity to ensure it can safely support your TV’s weight. Exceeding the weight limit can lead to instability and potentially damage your RV wall.
Conclusion
Figuring out how to attach a TV mount to an RV wall could be very challenging at first. But, it is a manageable task that you could do if you have the tools and follow the right steps. After installing your RV’s TV, you’ll surely be able to enjoy your favorite shows and movies while traveling!
Just remember that this is a general guide for you and that you should still look into your manufacturer’s manual for the complete installation details. Happy TV mounting!
“Hi, I’m Francis’ husband—Calvin. Our story began with our shared passion for traveling. I have had a career journey for over 11 years at Ford Motor Company, where I took on the role of BMS SW Process Engineer.
Together with my wife, I have dedicated countless hours to exploring every nook and corner of the world. Ten years living in an RV may seem long, but time seems to fly by when I’m doing what I love with the person I love.
FMCA’s 103rd International Convention & RV Expo in Gillette, WY,
Like my wife, I hope to help you see the beauty of traveling off the beaten path by sharing insights into this lifestyle. In addition to my corporate roles, I also launched our website – Outdoorbits, in 2015 and continue to contribute my knowledge and skills to the present day. And I’ll be completely honest with you—no hiding the truth or sugarcoating the possible challenges.
So, if you want to run away from the busy lifestyle to embrace nature, I’m your guy.”