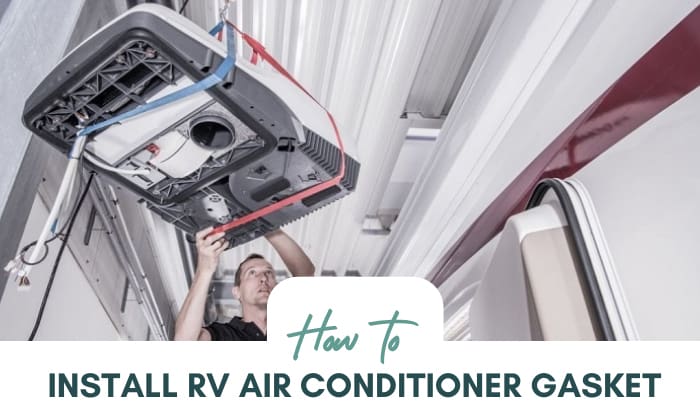
If you are having problems with your RV air conditioner such as leaks, then you should probably have the AC gasket replaced. The gasket works as an RV AC seal and helps mount your AC in place while keeping your RV cool. The RV air conditioner seal replacement procedures are quite easy.
If you want to know how to install RV air conditioner gasket, continue reading this article. You’ll find helpful tips and a step-by-step installation guide for an easier process.
Page Contents
- 6 Simple Steps to Install RV Air Conditioner Gasket
- What You Will Need
- Step-by-Step Installation Guide
- Step 1: Prepare your RV Roof
- Step 2: Remove the Air Conditioner’s Shroud
- Step 3: Remove the Air Conditioner from the RV’s Roof
- Step 4: Get rid of the Old Air Conditioner Gasket
- Step 5: Install the New Gasket and Put Back the Air Conditioner
- Step 6: Test your Unit and Clean Up
- Conclusion
6 Simple Steps to Install RV Air Conditioner Gasket

What You Will Need
Before we proceed to the step-by-step instructions, you need to first prepare the following items that you will need in the process. You need to make sure that you have all of the items near you before you start installing the air conditioner gasket so that you won’t have any problems throughout the process.
To help you prepare, here is a list of the things that you will need to install an RV air conditioner gasket.
- Putty knife
- Wire cutter
- Socket or wrench set
- Rubbing alcohol
- Screwdriver set
- Masking tape
- Gasket
- Heat gun
- Utility knife
- Old towels or blankets
- Soft cloth
Now that you have prepared all of the necessary items that you will need for the process, it’s time to move on to the RV air conditioner seal replacement procedures. If you are worried about doing the installation all by yourself, you can always call up a repair specialist for RV air conditioners to come and help you.
If you are going to do the process all on your own, take note that you need to have all of the tools ready since you’ll be working from your RV’s roof most of the time. Without further ado, here is the step-by-step on how to install RV AC gasket.
Step-by-Step Installation Guide
Step 1: Prepare your RV Roof
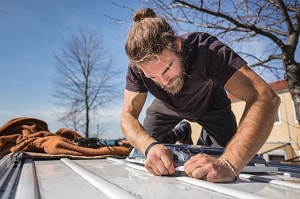
Before you start removing the old air conditioner, you need to first prepare your RV roof to prevent it from getting scratches as you work on it. To protect your RV roof, you can use old blankets or towels. Just use them to cover the area around your air conditioner unit.
If they won’t stay put, you can use masking tape to hold the blankets or towels in place. Make sure that they are secure in place because one small wrong move can scratch the paint of your RV roof.
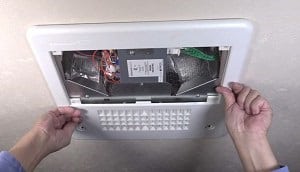
Step 2: Remove the Air Conditioner’s Shroud

The next step in the process after making sure that your RV roof is well protected is removing the air conditioner’s shroud. This part is what acts as a shield and covers the air conditioner’s interior parts. Be careful in removing this part as you will need it again for sure.
While it may depend on your air conditioner’s model, most shrouds can be removed with the use of a screwdriver. All you need to do is to locate the bolts or screws and undo them one by one.
Make sure to put the bolts & screws in a place where they won’t get lost since you will be using them later on. Carefully remove the shroud and set it aside.
Step 3: Remove the Air Conditioner from the RV’s Roof
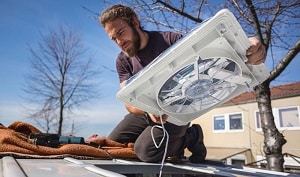
Once you’ve removed the shroud that covers the AC’s interior, you should now be able to see the fasteners that are holding the air conditioner to your RV’s roof.
Most RV air conditioners have a metal bracket below the unit on the RV roof’s underside and a gasket at the top of the RV roof and just beneath the AC itself. They are held together by bolts and screws that compress the AC unit to the gasket.
To remove the air conditioner from your RV roof, just remove the fasteners or the screws and bolts that hold the AC to the gasket. After that, check all the electrical connections of your AC unit. If it uses a harness-style connector, simply unsnap it. Otherwise, you need to use a pair of cutters to cut out three wires.
Before removing your air conditioner, make sure that the power is disconnected. Then, carefully slide out the air conditioner.
Step 4: Get rid of the Old Air Conditioner Gasket

Now that the air conditioner is removed, you need to carefully pull out the AC’s gasket from your RV roof or cut it out with the use of the utility knife. Check the area for any residue that’s left. If there is any, you can remove it with the use of a heat gun and a putty knife.
Once you are sure that there isn’t any residue left, clean the area to prepare for installing the new gasket. You can use rubbing alcohol and a soft cloth to wipe the area.
Step 5: Install the New Gasket and Put Back the Air Conditioner

Next, install the new gasket by placing it over the RV roof’s opening. Make sure that it is placed securely before taking your AC unit and placing it on top of the new gasket. Align everything properly before you reattach the air conditioner.
After installing the AC unit, reconnect all of the electrical wiring that you removed earlier. Once you are done, you can reattach the shroud back by screwing it in its place.
Step 6: Test your Unit and Clean Up
The final step in this process is to test if your air conditioner is working well. You may experience some problems with your electrical wiring, so make sure that all is well. Once you’ve done all the final checks, clean up the towels and blankets you used to cover your RV roof and return all the tools to their proper place.
Conclusion
For rig owners, knowing how to install RV air conditioner gasket is helpful knowledge that can help them save money and prevent further problems with their AC. Gone are the days when they have to worry about an AC that won’t work well with problems such as leaking and not being able to cool the RV enough.
Were you able to know the steps for RV air conditioner gasket replacement? Tell us what you think by writing in the comments below and don’t forget to share this article with your friends.
Read next: How Cold Should an RV AC Get?
“Hi, I’m Francis’ husband—Calvin. Our story began with our shared passion for traveling. I have had a career journey for over 11 years at Ford Motor Company, where I took on the role of BMS SW Process Engineer.
Together with my wife, I have dedicated countless hours to exploring every nook and corner of the world. Ten years living in an RV may seem long, but time seems to fly by when I’m doing what I love with the person I love.
FMCA’s 103rd International Convention & RV Expo in Gillette, WY,
Like my wife, I hope to help you see the beauty of traveling off the beaten path by sharing insights into this lifestyle. In addition to my corporate roles, I also launched our website – Outdoorbits, in 2015 and continue to contribute my knowledge and skills to the present day. And I’ll be completely honest with you—no hiding the truth or sugarcoating the possible challenges.
So, if you want to run away from the busy lifestyle to embrace nature, I’m your guy.”