At some point, there will come a time when you will need to learn how to install frameless RV window if you own one. However, such a task can be a little challenging, especially if you have no handyman background at all. But, worry not because I will be guiding you on how to do this every step of the way. I will also be providing several tips that will make the process much more comfortable. Shall we begin?
Page Contents
- Detailed Steps to Install Frameless Window
- What You Will Need
- Step-by-Step Instructions
- Step 1: Remove the Window Treatment
- Step 2: Remove the Old Window
- Step 3: Free the Window Seal
- Step 4: Clean the Window Area
- Step 5: Seal the Replacement Window (Optional)
- Step 6: Install the Replacement Frameless Window
- Step 7: Test the New Window
- Step 8: Reinstall the Window Treatments (Optional)
- Conclusion
Detailed Steps to Install Frameless Window
What You Will Need
Before proceeding to the actual process, you must first prepare a couple of things. Here are what you will need:
- Screw driver
- Ladder
- Silicone caulk
- Caulk gun
- Clean cloth
- The replacement windows
Step-by-Step Instructions
Now that you know the things that you have to prepare let us begin discussing the step-by-step procedure for installing frameless RV window.
Step 1: Remove the Window Treatment
If you do not have any window treatment, you can skip this step. However, if you do, it is best to remove it before replacing your frameless RV window because they can affect mobility and can also be damaged when removing the glass. It is best to keep it safe somewhere while working on the glass.
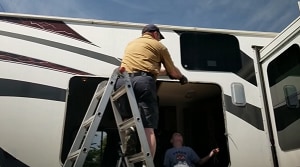
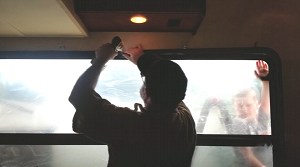
Step 2: Remove the Old Window
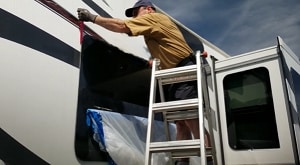
Now, for the fun part, remove the old window. To do this, you need to unscrew it off the wall by using a screwdriver. When few screws are left, make sure someone outside is assisting the window so that it does not fall and shatter.
Step 3: Free the Window Seal
Windows have seals that make them airtight and waterproof, so you need a little bit of effort to free the windows from it. For some cases, once the screws are off, the windows can immediately come off but if the seal is tight, carefully move the window to avoid shattering and causing injuries to you or whoever is nearby.
Step 4: Clean the Window Area
After removing the old windows that you have in your RV, some seal or dirt residue may be left around the window hole. It is best to clean it before proceeding to the next step.
Step 5: Seal the Replacement Window (Optional)
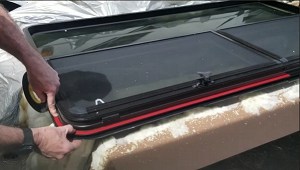
Before installing the replacement window, you must first apply a rubber seal on its lip. You can use a caulk gun for easy application. However, this step is optional, but it is not a significant effort, and it provides a good seal.
Step 6: Install the Replacement Frameless Window
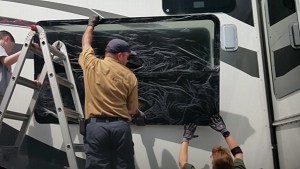
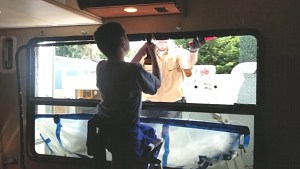
Once you have placed the gasket in the lip of your replacement window, it is now ready to be installed. To do this, you must carefully lift the window to the hole. It should slide right into the opening without any issues.
Ask somebody to hold the window from the outside and have someone assist you while you are screwing it on the wall inside. Make sure all the screws are tight and secure before letting go of the window.
Step 7: Test the New Window
When your new windows are installed, it is a good practice to test whether it functions properly or not. Try opening it to its maximum capacity. Also, check whether all the corners are sealed and waterproof. If you notice some leakages, use additional sealing material but make sure to apply it properly, so it does not look dirty.
Step 8: Reinstall the Window Treatments (Optional)
Once you are sure that your new windows are correctly installed, you can now put back the window treatment that you removed in the first step. After that, you are all done.
Conclusion
There you have it. Those are the 8 easy steps on how to install frameless RV window. Doing the process requires care and precision. It would be better if you have some help with you, especially during the placement of the actual window to avoid breakages or dents. Aside from that, the process can be considered relatively easy.
Moreover, it is essential to make sure that your RV’s windows are in pristine condition. It is vital in protecting you from the harsh elements of the outdoors, and it also provides privacy for those who are inside the RV.
Let us know what you think of this tutorial by commenting down below. We would love to hear how your installation went or if you have any tips to offer those who are installing theirs soon.
“Hi, I’m Francis’ husband—Calvin. Our story began with our shared passion for traveling. I have had a career journey for over 11 years at Ford Motor Company, where I took on the role of BMS SW Process Engineer.
Together with my wife, I have dedicated countless hours to exploring every nook and corner of the world. Ten years living in an RV may seem long, but time seems to fly by when I’m doing what I love with the person I love.
FMCA’s 103rd International Convention & RV Expo in Gillette, WY,
Like my wife, I hope to help you see the beauty of traveling off the beaten path by sharing insights into this lifestyle. In addition to my corporate roles, I also launched our website – Outdoorbits, in 2015 and continue to contribute my knowledge and skills to the present day. And I’ll be completely honest with you—no hiding the truth or sugarcoating the possible challenges.
So, if you want to run away from the busy lifestyle to embrace nature, I’m your guy.”