If you’ve just bought a new travel trailer, you may have heard anything regarding choosing a sway bar for trailers and the process on how to install a sway bar on a travel trailer.
In any case, what exactly are trailer sway bars, and are they even required?
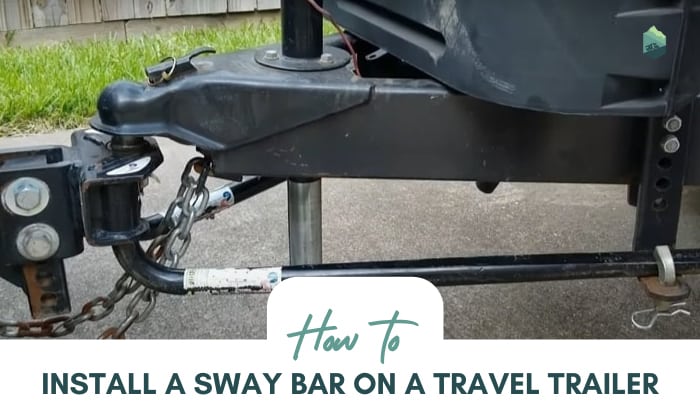
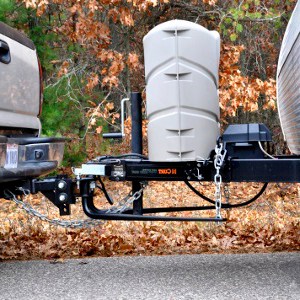
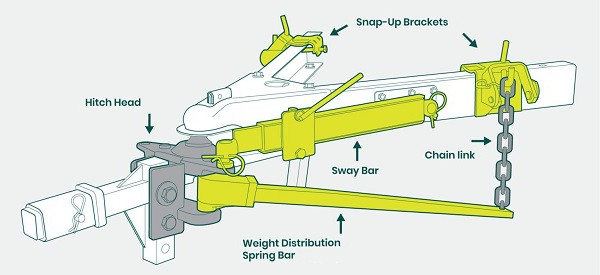
Trailer sway bars attach to the tow hitch and offer an extra attachment point between the trailer’s tongue and tow hitch, reducing and dampening trailer wobble due to friction between the bars.
More than simply its fundamental function, trailer sway bars have various other characteristics worth learning about. Continue reading to know more about travel trailer sway bar installation.
Page Contents
Simple Steps to Install a Sway Bar
What Tools to Prepare
- A sway bar
- A drill
- Series of drill bits
- Sockets
- Torque wrench
- Measure tape
- Marker
- A couple of metal clips
- Lubricating oil
Please remember that:
Find the right sway bar for your tow vehicle and trailer by understanding their specifications. Also, use caution when attaching a sway bar because there are some risks involved.
Allow the manufacturer to demonstrate how to change the tension adjustment screws so you understand which direction to turn to increase or reduce tension. Remember that each sway bar is unique, and not all of them will fit your trailer.
Step-by-Step Guide
Step 1: Secured tow vehicle and trailer in place
Pull the tow vehicle and trailer to a level spot on the ground. Keep the trailer tongue linked to the tow package and securely secured in place.
Step 2: Positioning the ball’s post
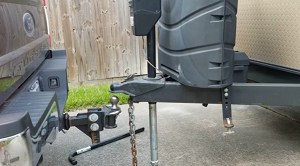
Align the sway control ball connected to a shaft with a hole combination in the tow vehicle’s tow bar by positioning the ball’s post with the whole variety.
Tow bars are typically adjustable in span; therein are many holes in the several holes and outer sleeve in the inner rod, simply one of which is filled by the tow bar’s locking pin, and the length of the tow bar may be adjusted as well.
Pass the shaft of the sway control ball through an empty combination, and then tighten the nut and lock washer that approached the ball using a socket set to secure it in position on the ball. You can use the torque wrench for this.
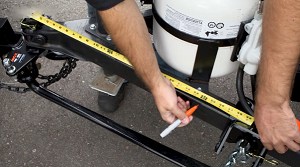
Use a permanent marker pen to make a mark on the trailer tongue after measuring rearward from the coupler as instructed by the sway control instructions using a tape measure and marking it with a permanent marker pen.
The standard distance between the two points is between 20 and 24 inches.
Create a sign on the side part of the tongue that corresponds to the side part of the tow vehicle’s tow bar, wherein the sway control ball will be installed later in the process. (Optional)
Make a mark through the four fastener holes in the plate with a permanent marker and place the sway control ball connected to the scale up to the spot with a permanent marker.
Step 3: Drill holes through the tongue rail
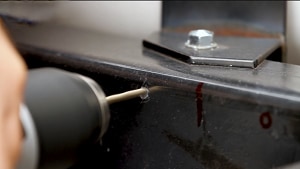
Drill four holes through the tongue rail at the indicated locations.
The sway bar installation instructions will specify the proper drill bit to use to handle the nut-bolt-washer combinations that have been provided; usually, a 3/8-inch bit will be sufficient.
To connect the sway control ball to the plate using the supplied fasteners, use a socket set to tighten the bolts on the ball.
Step 4: Apply lubricating oil
Apply lubricating oil to both sway control balls, if provided or suggested by the manufacturer, and then position the receiver at each end of the sway control bar over the two balls, pressing them down until they engage with the receivers.
Lock them in place according to the instructions given in the literature; typically, two cotter pins are supplied.
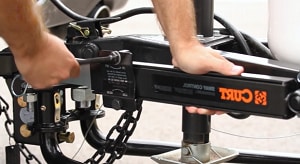
To calibrate the sway bar, follow the manufacturer’s directions. Typically, this involves hand-tightening an outer locking ring or an on/off lever, driving the tow vehicle a short distance while keeping the trailer insight, and then re-tightening the ring or handle.
8 Adjustment Tips to Install Sway Bar on Camper
Tip 1: Getting a pair of sway bars that suit your trailer is one of the first things you should do.
Not all sway bars are created equal, and some are incompatible with surge brake trailers. Only inevitable hitches and weight restrictions are compatible with the sway bars.
Tip 2: Tow a trailer at regular towing speeds when fully loaded. Keep an eye on your trailer’s movements, and when you come to a halt, look for the tension screws. After then, you may adjust the tension by turning the 14 to the left or right. Your test drive should determine the direction you need to change that tension screw.
Tip 3: If the trailer still sways after the 14-turn adjustment, spin the screw an additional 14-turn on the side where the trailer sways the most. It is not necessary to adjust the sway bar for the travel trailer every time you make a change.
Tip 4: If it’s ice, snowing, or pouring outside, you should remove the sway bar. Then, when it’s time to replace the sway bars, you’ll need to repeat the test drive and adjustment procedure.
Tip 5:When installing the sway bar, be sure to follow all of the manufacturer’s instructions. Don’t guess you know how to do it because all sway bars are not created equal, and there is no one-size-fits-all gadget. Choose the right sway bar for the size and weight of your trailer.
Tip 6: Depending on the design and brand of your sway bar, you may need to crank the handle to add or remove friction. You crank the lever until the conflict between the tow vehicle and the trailer is just perfect.
Tip 7: It’s a good idea to understand how your sway bars work.
Their primary function is to prevent a vehicle from leaning. When your car comes into contact with sway causes, the stiffness reduces the amount of lean it feels.
Tip 8: Managing your tongue weight is one of the changes you can make that will indirectly assist the sway bar function better. If you keep your tongue weight between 12 and 15%, your sway bar shouldn’t have too much difficulty.
Conclusion
It will not be difficult to adjust and install your new sway bar. And it’s important since the sway controls the balance of your vehicle. All you require to do is know what you’re doing. If you can’t find competent assistance, go to your dealer, have it installed for you, and deal on how to install a sway bar on a travel trailer.
If you find this article helpful, you can share it with your trailer owner friends. Thank you for reading.
“Hi, I’m Francis’ husband—Calvin. Our story began with our shared passion for traveling. I have had a career journey for over 11 years at Ford Motor Company, where I took on the role of BMS SW Process Engineer.
Together with my wife, I have dedicated countless hours to exploring every nook and corner of the world. Ten years living in an RV may seem long, but time seems to fly by when I’m doing what I love with the person I love.
FMCA’s 103rd International Convention & RV Expo in Gillette, WY,
Like my wife, I hope to help you see the beauty of traveling off the beaten path by sharing insights into this lifestyle. In addition to my corporate roles, I also launched our website – Outdoorbits, in 2015 and continue to contribute my knowledge and skills to the present day. And I’ll be completely honest with you—no hiding the truth or sugarcoating the possible challenges.
So, if you want to run away from the busy lifestyle to embrace nature, I’m your guy.”
