During one of your road trips, a mishap might have resulted in a broken or cracked RV window. I understand the struggle you’re going through. If your windows have any cracks, they may become an aesthetic eyesore. To resolve this problem, you must be familiar with the correct answer to “how to replace RV window glass.”
This tutorial will assist you in removing and replacing an RV window glass with mainly a screwdriver. Apart from that, you should include a replacement window, a plastic scraper, a new rubber gasket, a hard ruler, gloves, and a compass or a radius template. It’s time to get started, so read on!
Page Contents
- Super Easy Steps to Replace RV Window Glass
- What Will You Need
- Step-by-Step Instructions
- Step 1: Take the window down
- Step 2: Remove the screws
- Step 3: Remove the glass from the RV’s window
- Step 4: Measure the RV window
- Step 5: Find the ideal replacement windows
- Step 6: Clean the window
- Step 7: Put the RV window and glass together
- Step 8: Put the gaskets in place
- Step 9: Repair the window frame
- Safety Measures While Dismantling an RV Window
- Frequently Asked Questions
- Conclusion
Super Easy Steps to Replace RV Window Glass
What Will You Need
- A screwdriver
- A replacement window (if needed)
- A plastic scraper
- A new rubber gasket
- A hard ruler
- A compass or a radius template
- Gloves
Step-by-Step Instructions
Step 1: Take the window down
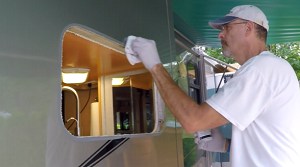
The rubber gasket surrounding your RV window should be examined. Make sure to keep an eye out for any rubber that seems to be disrupting the gasket’s continuity.
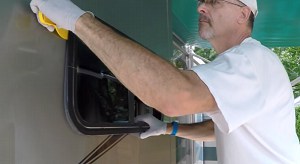
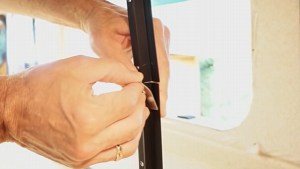
Remove the rubber window gasket from the outside edge of the glass pane by peeling it off or inserting a flat-tip screwdriver into the split. The rubber should be long enough to remove with one hand.
Step 2: Remove the screws
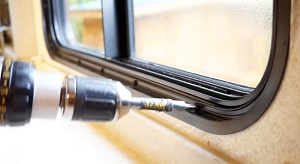
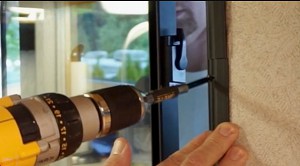
After the first step, the screws for the mounting should be visible. Screwdrivers may be used to remove the screws. To avoid mishaps, I recommend that someone hold the RV’s window glass. The window frame may be easily removed by removing the screws. However, the glass in your windows might shatter if you aren’t careful.
Step 3: Remove the glass from the RV’s window
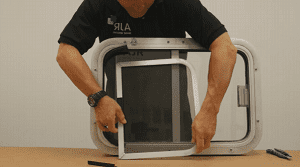
Pull the RV window glass out to the side and lower it. Gloves are an excellent option for improving your grip and reducing risks. The RV window glass should be carefully lowered to the ground.
After the RV window removal, please follow the steps below to replace it:
Step 4: Measure the RV window
- Find the chasm
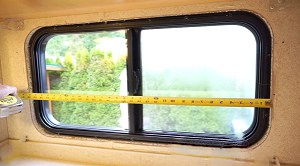
Do not attempt to measure an old window. Comparison with the original window size is a bad idea. You should measure the window’s width and height. Make sure you measure to the nearest millimeter at all times.
- Sidewall measurement
The depth of the window may be measured by stapling a hard ruler into the opening. A wall can be measured from the inside to the outside of it. Consider the thickness of the window frame when determining the sidewall depth.
- Measure the corner radius
It is possible to skip this step if your window is square. It is important to know the radius of your window’s corners if it has rounded corners. Use a compass or a radius template to get this information. After that, the template’s radius should be compared to one of the window’s corners.
Step 5: Find the ideal replacement windows
Finding the correct RV window replacement is as easy as assessing the specs of your current window, especially its thickness. Now that you have all the measurements, you can figure out the window sizes.
You may purchase replacement windows from RV manufacturers or have them custom-made. The second option is far less expensive, but it’s entirely up to you. The best way to save money is to get your own from an RV shop if you don’t have any. Remember that most RV insurance plans do not cover the cost of replacing your windows.
Step 6: Clean the window
Remove any adhesive or rubber residue from the window’s sides by scraping it with a plastic scraper. Surface debris and dust may compromise the window’s ability to close properly. If the window isn’t completely smooth, run your fingers along the whole length.
Step 7: Put the RV window and glass together
The window frame from your RV may be reused, or you can purchase a new one. The market has many choices for RV window glass replacement projects to allow you to complete your home improvement job quickly.
When you’re done, just lay it down. Insert the new RV window in the frame, and make a bridge by taping two surfaces together across the junctions. This shields the RV’s glass from damage while it’s being transported.
Step 8: Put the gaskets in place
Use a new rubber gasket to create a tight seal around the window of your RV. Even if your current rubber seems to be in decent condition, I strongly advise you to replace it. Put the thin one on when you’re done putting in the thick gasket. Using a screwdriver or putty knife, push down on the gasket until it’s flat.
Step 9: Repair the window frame
Install the window glass and frame with the assistance of a helper. Fix the edge’s holes so that they match those in your window. After removing the window frame screws in step 1, reinstall them. Keep an eye on how the window moves. If you have trackless windows, they should open and close smoothly. Your frame may have been misaligned in some way if this is not the case.
Safety Measures While Dismantling an RV Window
Precautions to take before uninstalling an RV window to avoid unpleasant shocks and water leaking:
- Properly disassemble the window
- Remove the gaskets with care
- Then, re-clean the gaskets to ensure that the vehicle stays dry
Frequently Asked Questions
What to know while selecting window tinting?
It’s not always preferable to go darker. A VLT rating of 20 percent or less might make your RV’s interior gloomy, even on the hottest of days. It also makes it harder to see as the hues of the surrounding landscape are altered.
During the day, darker windows provide seclusion, but at night, they reduce it. As an actress on a brilliant stage in a dark theater, you are visible to everyone outdoors once the sun goes down.
What distinguishes RV glass from automobile glass?
Size is the most evident difference between RV and car windows. The windshields on recreational vehicles (RVs) are larger. Occasionally, the windshield may be divided into two pieces, making the process of replacing it easier. Molding is often used to secure windshields in RVs. It is not kept in place by a urethane seal like automotive windshields.
Conclusion
You should not be too concerned about RV windows that have been shattered, cracked, or broken. You may save money by learning to remove and replace RV window glass on your own, even if you have to pay for a replacement.
Please tell me if this article on how to replace RV window glass was helpful. Is there anything we haven’t covered? Thank you for taking the time to read our how-to guide. Moreover, if you found it useful, you may want to forward it to your friends.
“Hi, I’m Francis’ husband—Calvin. Our story began with our shared passion for traveling. I have had a career journey for over 11 years at Ford Motor Company, where I took on the role of BMS SW Process Engineer.
Together with my wife, I have dedicated countless hours to exploring every nook and corner of the world. Ten years living in an RV may seem long, but time seems to fly by when I’m doing what I love with the person I love.
FMCA’s 103rd International Convention & RV Expo in Gillette, WY,
Like my wife, I hope to help you see the beauty of traveling off the beaten path by sharing insights into this lifestyle. In addition to my corporate roles, I also launched our website – Outdoorbits, in 2015 and continue to contribute my knowledge and skills to the present day. And I’ll be completely honest with you—no hiding the truth or sugarcoating the possible challenges.
So, if you want to run away from the busy lifestyle to embrace nature, I’m your guy.”
