You looked at your RV’s skylight recently and thought that it was time to change it. You know that the first step to installing a skylight in an RV is measuring the dome. But how to measure RV skylight, especially if you’re a beginner at this task?
Take note that you don’t need expensive equipment to measure an RV skylight replacement. Some tools, such as a steel tape measure and a pencil, might already be in your vehicle’s toolbox.
It might look like a straightforward task, but missing some details can lead to errors. Therefore, you should continue reading so you’ll know the right items and processes for this operation.
Page Contents
Simple Steps to Measure RV Skylight

What You’ll Need
Whether you’re going to measure an RV shower skylight or a dome window above your motorhome’s living area, you need to use the right tools to measure that part properly. The items you’ll need are:
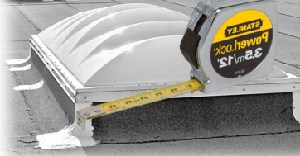
- Steel tape measure

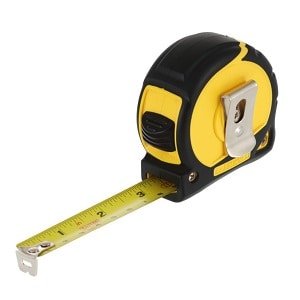
A steel tape measure is a versatile tool for making precise measurements. You can carry this reasonably small tool in your pocket or place it in a toolbox when you’re not using it.
Although you can use a conventional tape measure, the soft material can make measuring more challenging than intended. On the other hand, steel tape measures will have features to help lock them in place.
- Pencil


You can use an old pencil that’s lying around in your RV to help mark the measurements for your RV skylight replacement. But consider using a carpenter’s pencil for this job.
You can use these versatile tools to mark different surfaces, including a glass RV skylight. This special pencil doesn’t leave a permanent mark, unlike other types of pencils, particularly those used for art.
Sharpening a carpenter’s pencil requires a knife, but you can also use a special sharpener for that specific task.
- Step ladder

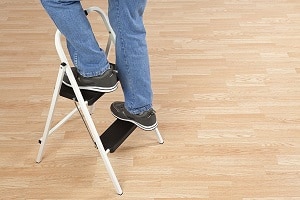
If you’re going to install an RV skylight at a relatively tall height, such as the roof of a tall camper, you should use a step ladder. Otherwise, you’re going to be at a high risk of contracting injury as you climb up the vehicle.
You can use two-step ladder variants for climbing your RV, which are the front step ladder and the twin step ladder.
The front step ladder has rungs on one side to support the tool as you climb. On the other hand, the twin-step ladder has rungs on both ends, allowing for a safer climb. However, twin-step ladders are bulkier than front-step ladders.
Aside from the items mentioned above, you can also use a measuring guide if you’re going to install blinds over your RV skylight. The manual will help organize your measurements to assist you in purchasing the correct RV window blinds.
Step-by-Step Instructions
Without prior experience, measuring an RV skylight can be tough, even if you have the right tools. Don’t rush this process to avoid committing costly mistakes. With that in mind, here are the steps to measure your motorhome or travel trailer’s skylight properly.
Step 1: Check for the Depth
When assessing the depth of your RV’s skylight, take into account the different obstacles that may prevent a proper installation. Generally, you’ll need a minimum depth of 1-1/2 inches to install the skylight brackets to mount the covering properly.
Also, take note of the existence of other fixtures in the area, such as window cranks and handles. These items can prevent you from mounting the skylight correctly.
Step 2: Measure the Height and Width
Start this step by measuring the width in three places, which are the bottom, middle, and top of the window. Then, measure the opening from one edge to another. Make sure that you’re measuring inside the skylight.
Then, measure the height in three places, which are, again, the bottom, middle, and top of the skylight. Keep in mind that taller openings may require additional mounting hardware.
You should get the proper dimensions for your new RV skylight after this step.
Example measurements that you may achieve are for a 17×25 RV skylight or a 25×25 RV skylight.
Step 3: Buy the Product

Now that you have your measurements, it’s time to purchase the correct replacement RV skylight. If you’re ordering online, ensure that you’re buying a product at the narrowest width and shortest height of your measurements.
Don’t buy a new RV skylight while thinking you need an allowance. Additionally, ensure that the corners of the new window are 90 degrees. Otherwise, you may need extra hardware for an outside mount.
The Types of RV Skylight
Generally, you have three design options to choose from for RV skylights: fixed, tubular, and ventilated.
- Fixed RV skylights: As their name implies, fixed skylights don’t move after the installation. This option is ideal for providing reasonable insulation, which is ideal for cold weather.
- Tubular RV skylights: Tubular skylights are great for RVers wanting to provide illumination without affecting the interior temperature. These variants are also quite durable.
- Ventilated RV skylights: Ventilated skylights work seamlessly with the inside of RVs by allowing proper airflow.
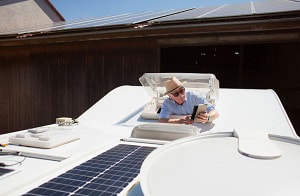
Steps to Replace an RV Skylight
After finding the measurements for your new RV skylight, you might want to proceed with the installation by following DIY practices. The following steps to achieve this objective depend on knowing the different options to do a proper installation.
- Follow the instructions that should come with the product.
- Remove the old sealant by scraping it with a painter’s knife. Avoid using other types of knives as they can scratch the surface of your vehicle.
- Remove the RV skylight screws. If these parts aren’t bent or rusty, you can use them again for the new installation.
- If you’re replacing a cracked RV skylight, dispose of the old opening properly.
- Run a thick bead of new caulk or sealant around the opening.
- Install the new RV skylight. Add extra sealant on the screws for extra security.
- Add extra caulk to help create a barrier if you see some gaps. In turn, it’ll help prevent leakage.
- Wait for the sealant to dry before checking if you did the install process correctly.
You can also watch the following video if you want to see how to do these steps as accurately as possible.
Conclusion
Did you like what you read? Now that you reached the end of this guide, you should now have a good idea of how to measure RV skylights accurately.
If you want to share your thoughts, especially if you have stories about your RV skylight measuring endeavors, feel free to mention them in the comments. You can also post your questions about this topic in that section.
Remember that you should take your time in measuring the dimensions of the new skylight for your RV. Doing each step in a hurry can result in costly errors.
Additionally, make sure to prepare the necessary tools before you start the installation. That way, you won’t have to take multiple trips to your local hardware store.
“Hi, I’m Francis’ husband—Calvin. Our story began with our shared passion for traveling. I have had a career journey for over 11 years at Ford Motor Company, where I took on the role of BMS SW Process Engineer.
Together with my wife, I have dedicated countless hours to exploring every nook and corner of the world. Ten years living in an RV may seem long, but time seems to fly by when I’m doing what I love with the person I love.
FMCA’s 103rd International Convention & RV Expo in Gillette, WY,
Like my wife, I hope to help you see the beauty of traveling off the beaten path by sharing insights into this lifestyle. In addition to my corporate roles, I also launched our website – Outdoorbits, in 2015 and continue to contribute my knowledge and skills to the present day. And I’ll be completely honest with you—no hiding the truth or sugarcoating the possible challenges.
So, if you want to run away from the busy lifestyle to embrace nature, I’m your guy.”